Power-up your ESP8266 and ESP32 projects: browser-based installation and configure Wi-Fi via Bluetooth LE
ESP8266 and ESP32 are microcontrollers made by the Chinese company Espressif. Microcontrollers are teeny tiny computers with little processor power, memory and space that can interact with sensors, send infrared commands and many other things.
With the ESP devices Espressif has achieved something formidable: their devices
have Wi-Fi, are compatible with code for the popular Arduino microcontroller
and they are cheap. Like, $5-including-shipping-from-China-cheap
(AliExpress
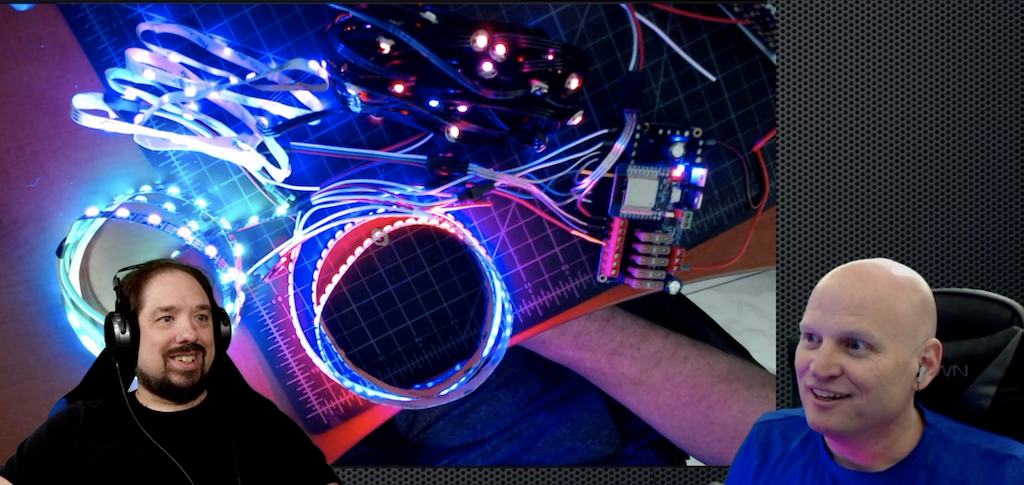
 Quindor and DrZzs playing with an ESP32-based QuinLED running WLED
(YouTube
Microcontrollers are just computers and so are nothing without their software.
Open source software like ESPHome
But these projects all have a common problem: it is difficult to get started. We identified three pain points:
- Installing the software on the microcontroller.
- Connecting the microcontroller to your wireless network.
- Configure the software on the microcontroller.
These pain points stand in the way for creators to reach a wider audience. It’s our mission to make local home automation succeed, and these projects, and all the possibilities that they unlock, are an important part of this.
Today, we are introducing some things to make using microcontrollers easier.
Using terms everybody understands
We are going to start using words that a user understands instead of forcing the technical terms on them. Terms like “firmware” and “flashing” are the correct terminology but for inexperienced users they do more harm than good. They will make the user feel uncomfortable before they even start.
So instead of “upload firmware” we’ve updated the ESPHome dashboard to talk about “installing”. We are encouraging other projects to do the same.
Things will get more technical as a user continues playing with microcontrollers. But this change might just be that little thing why they will actually continue.
ESP Web Tools: Installing projects on your microcontroller via the browser
We have created ESP Web Tools
This works for both the ESP8266 and ESP32 and with any project for these devices. This technology is powered by Web Serial, a web standard for serial communication that is part of Google Chrome and Microsoft Edge.
ESP Web Tools Web has already been adopted as part of the onboarding by
WLED
Learn how to add ESP Web Tools to your website
If you have an ESP32 or ESP8266 device handy, you can try it out right here:
ESP Web Tools uses code
Note: We don’t like to use technology that is not available in all browsers and cannot be made available in other ways. However, in this case the benefits outweigh the cons. We hope that Firefox and WebKit add support for Web Serial in the future.
Improv Wi-Fi: Open standard to provision Wi-Fi credentials via Bluetooth Low Energy
We have created Improv Wi-Fi
For open source firmware there are two popular ways of getting a device to connect to your wireless network. The device sets up a wireless network and you need to connect to it via your phone or laptop, or the user compiles the network and password into the firmware before installing it on the ESP. Both methods are difficult and error prone, they offer a bad user experience.
If you look at off-the-shelf products, you see another approach: send Wi-Fi credentials to the device via Bluetooth Low Energy (BLE). BLE allows the user to get instant feedback if something goes wrong. This technology is used in many products, but there is no open standard that is free to implement. Improv Wi-Fi is an open standard that is free to implement.
Open source projects often host their control interface as a website on the ESP device. Improv Wi-Fi supports this and when provisioning is done, the user can be redirected to a URL to finish onboarding.
Improv Wi-Fi can be used today to provision ESP32 microcontrollers running
ESPHome
Improv Wi-Fi is also available for the web in the form of a button that can be added to your website. This will allow users to configure and set up a device from any browser that supports Web Bluetooth.
If you’ve used the installation button in the previous section but have not yet connected it to the wireless network, you can onboard that device here:
ESPHome Dashboard: simplified and streamlined
With ESPHome
# Example ESPHome configuration
sensor:
  - platform: dht
    pin: D2
    temperature:
      name: "Living Room Temperature"
    humidity:
      name: "Living Room Humidity"
    update_interval: 60s

The ESPHome Dashboard has been updated with a simplified and streamlined wizard for new configurations. You now enter the name of your project and your Wi-Fi credentials and it will install it on your ESP device via the browser. After that all further updates will happen wirelessly.
ESPHome: embracing projects
We want to make it easy for creators to sell ESPHome powered products that offer a great user experience. ESPHome projects embrace local control and integrate nicely with Home Assistant, and so each extra ESPHome product that our users can buy is a win.
To make it easier to keep creators and users connected once a product is
installed, projects can now add a project identifier and version to their
firmware (docs
The goal is to integrate the projects tighter into the ESPHome dashboard by showing the project’s logo, link to the documentation and issue pages and allow installing updates.
Why we build this
Home Assistant’s mission is to make local home automation a viable alternative to cloud based solutions and accessible to everyone.
To make this mission a reality, we started the company Nabu Casa. Together with the community, Nabu Casa develops Home Assistant and ESPHome and is funded solely by people that support this mission. No investors or loans.
If you want to help fund our work, subscribe to Home Assistant Cloud